In some cases it is unfortunate that we have to hire a bad hosting provider, then we have to switch to another provider better. In this article I will show you how to transfer hosting with step by step instructions.
Transferring a web host, step by step.
What you need to do is just
- Find yourself a good web host.
- Back up and download all your files from the old host.
- Upload your files to the new web host and check if everything’s ready.
- Transfer your DNS registration at your domain agent.
- Keep the old host alive for a day or two (or a week to be safe) for the DNS to sort out.
- Done.
What’s catchy?
Basically none.
If you’re already running a website, you shouldn’t be having any trouble on the transfer. These are just all the usual download/upload stuffs that you ALREADY done daily. What might be new to you could be the DNS transfer – which is a extra-small matter to be settled in minutes and I’m gonna tell you how in details here.
Changing your website DNS
For the sake of simplicity, you can assume that DNS is how you tie-up your domain (www.webhostingsecretrevealed.net) with your hosting (hosted on HostMonster). So when you’re switching your web host, you need to switch your DNS registration accordingly.
Assuming that you’re switching to BlueHost had your domain name registered with GoDaddy, here’s how you can change your DNS.
Take a look at the hosting account information that you received through email from BlueHost .Check out the name servers assigned to your account, it should look something like: ns##.bluehost.com
ns##.bluehost.com; where ## refers to a series of numbers.
Go to GoDaddy’s main page, login, and get yourself to ‘Manage Domains’ > ‘Domain Control Center’ > ‘Name servers’.
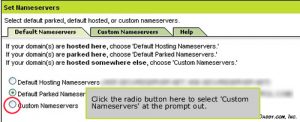
Select custom nameserver at the prompt out

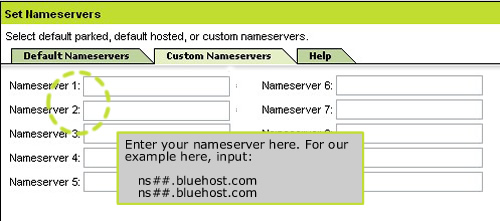
Input your new name server (ns##.bluehost.com in our example) into the first two row.

Click on ‘Go’ or ‘Save Changes’ and there, you’re done.
Pretty simple, don’t you think? Now go get rid of your lousy web host and have a hassle-free web host!


![[How To] Best Dedicated Server: Choose The Best Dedicated Server For Less](https://easypromocode.com/wp-content/uploads/2020/05/dedicated_server-2-100x65.jpg)


