Creating your own email domain name (eg [email protected]) generally applies to businesses or professional sites. Previously, we could easily do this through Google App Business service because it’s free, but sadly now it was mandatory surcharge for $ 3 / email / month. One figure is not small if you want to create about 5 different email.
But not to worry too because now there are so many email services to create the domain name that is completely free, even without the use of services that you can create using quality foreign hosts high 1and1 or HostGator . But in this article, I will introduce a service to other people similar to Google App Business which is completely free, which is Zoho Mail .
Overview of Zoho Mail
Zoho Mail is an email archiving services, such as Gmail or Yahoo same, but it can be synchronized with other utility services like Zoho Zoho Docs, Zoho Storage. The difference is Zoho allows you to use your own domain name as soon as the registration without going through another service like Google App Business. Obviously it was born to cater to the needs of professional email.
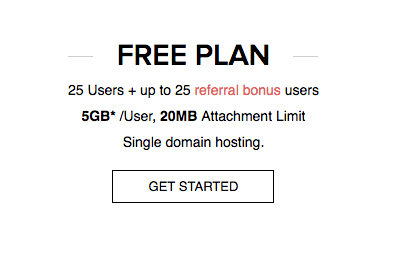
Zoho Mail has many different frames lowest price is free (to use one domain, 25 users and you can get more 25 users referral bonus users) and the highest is $ 10 / user / month. But if you are a blogger or website, only medium free so it is more than enough, hard to see a tiny ad only.
Registration instructions using Zoho Mail &
To register, please visit the address https://www.zoho.com/workplace/pricing.html?src=zmail and click on GET STARTED Free of price lists offline. Then enter the address you need to use email domain.
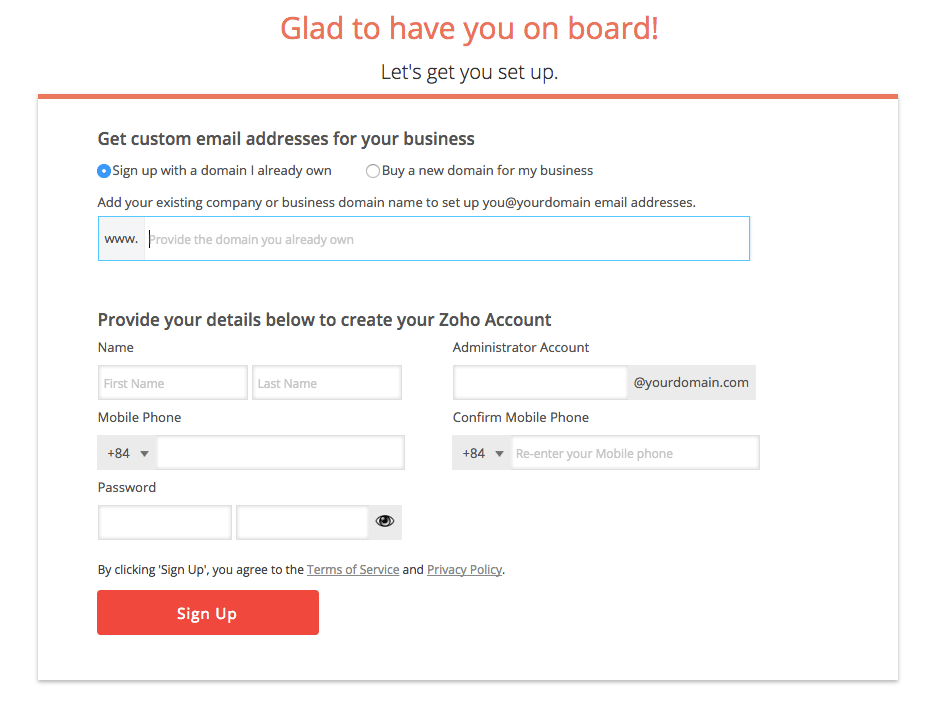
Enter your domain , admin email , your phone number , set Password and click Sign Up
Enter your verification code .
Note section log into Zoho ID, simply enter your name and later want to log in, you will be filled with the [email protected] structure. Sign Up button completed and wait a while.
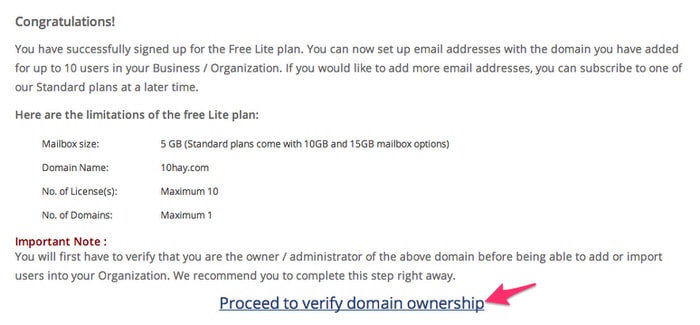
Then it will pop up a confirmation sheet registration information and invite your requests authenticated domain, click the link to verify Domain Ownership Proceed to start authentication.
It will take you to an authentication page, your work need to do now is to modify the DNS record for the domain in accordance with their requirements.
The first is that it will ask you to fill in a CNAME record with its own value they provide, or you can select TXT method method (uploading the file to the host), HTML Method (add HTML tags to the website). But here I will guide how to authenticate using correct DNS.
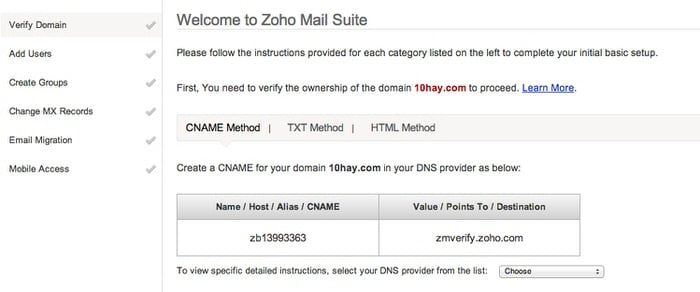
And I will correct DNS as follows:

When conversion is complete, you should wait 10 minutes after and back pages of the Zoho Mail Authentication and press the Verify button below to finish.
If authentication is successful, it will require you to create an email account as shown below.
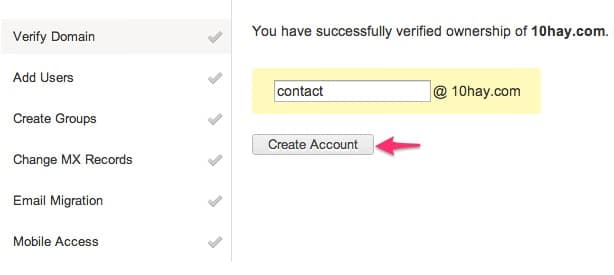
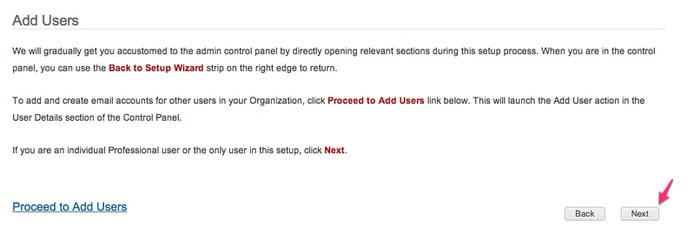
Then another panel appears and just press Next.
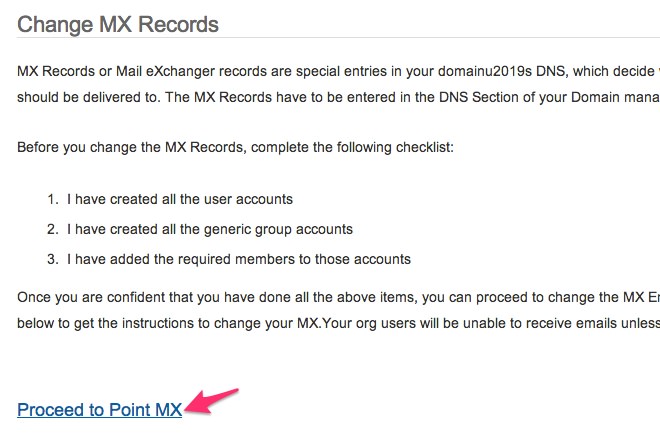
Next time you press the 2 button Proceed to Point’ll see MX, please click on it to start the DNS for the domain setup skip this step because if your email will not be able to receive email if sent to the address someone by name domain.
Then you add two MX records in the DNS type parameters are:
Add MX record on DNS 2
| host Name | Address | priority |
| @ | mx.zohomail.com | 10 |
| @ | mx2.zohomail.com | 20 |
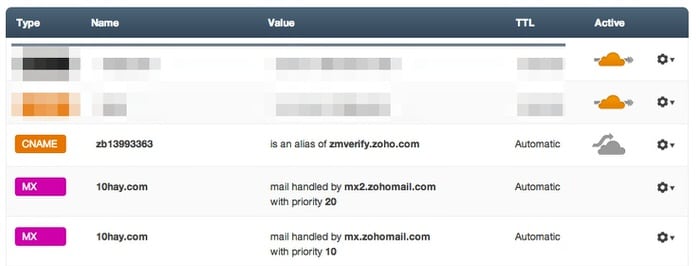
Change Zoho finished, back page, scroll down and click the Next button, and any of the following options Next if you do not need. Finally press Done.
If you are using the old MX record, delete gone before adding MX records to Zoho Mail.
Then click the link to log into your email and they give you will be redirected to the mail box, complete the registration process Zoho Mail under your own domain name.
Do not forget to try taking a different email and send it to the newly created email address is not whether it works offline.
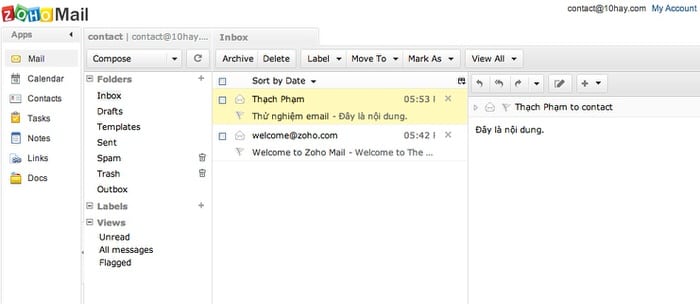
If you have problems receiving email from Zoho email without getting people sent by the DNS is not fully updated. Be patient and wait, one day can be lost depending on the sender’s e-mail network.
How to create an email domain name
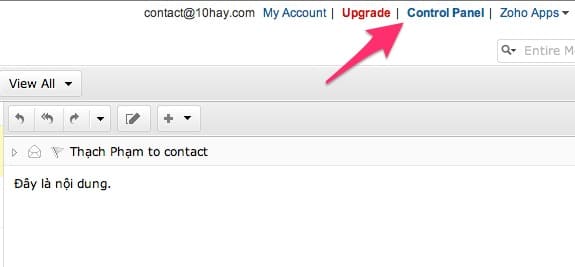
You access the Control Panel on the menu.
Access to the User Details and click the Add User.
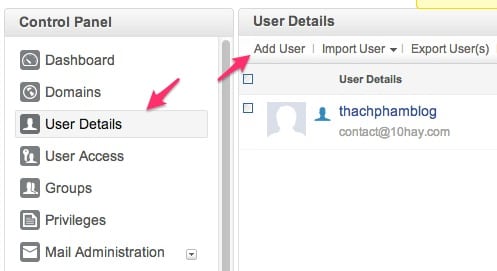
Just fill out the information for users and start creating, without any further setup for the domain.
Note that keep records of the domain MX then, if cleared away, you will not be receiving any more emails.
Simple but great is not it? Wishing you an email soon have the most professional private domain.


![[How To] Best Dedicated Server: Choose The Best Dedicated Server For Less](https://easypromocode.com/wp-content/uploads/2020/05/dedicated_server-2-100x65.jpg)


